• 07Jul

    In blatant ritualization of my amazing narcissism, I frequently have ‘date nights’ at home with myself: I cook an elaborate meal, drink good wine, and watch terrible reality TV. My most recent such evening, I was also feeling a bit lazy, so I went for something simple and unplanned, but which turned out to be awesome, and I want to remember it for the next time I cook for an actual date.
    http://www.flickr.com/photos/jennifrog/5138834425/

    The recipes below are more or less in the order I made them, but that has more to do with making it all up as I went than any intention. What I ate, in order: salad, soup, fish and veggies, cheese, chocolate. I drank a Malbec from Catena, but cooked with one from a box.

    Stock/soup

    1 carrot, sliced thin
    1 red onion, diced
    About 1/2 cup of diced celery hearts
    3 sun dried tomato halves
    3 cloves garlic (peeled, whole)
    Handful tellicherry peppercorns
    1 whole star anise pod (about 6 seeds)
    1 bay leaf
    3 cloves
    Vegeta
    Sherry vinegar
    3/4 cup red wine
    5 cups water
    Olive Oil
    Sesame Oil

    I tossed the celery, onions, carrots and garlic into a large pot over medium-high heat, and let them start to caramelize. Once they start sticking to the bottom (but not quite charring yet), I added a small splash of sesame oil and a good dose of olive oil, let that get hot, and then deglaze with 1/2 cup of the wine.

    I then added the water and the rest of the wine, plus sun dried tomatoes, dry spices and Vegeta (I used about 1/5 tbs…adjust to your taste). I brought to a boil and then back down to simmer, uncovered, for about 40 minutes. I added a splash or two of the vinegar about 3/4 of the way through.

    While the stock was bubbling away, I made my salad by putting some raddicchio, baby spinach, frssé, and fresh dill into a bowl and topping it with finely diced yellow squash and some grape tomatoes.

    I also prepped the fish, using:

    1 mahi mahi fillet, either fresh or flash-frozen but fully thawed, rinsed and patted dry.
    1/4 yellow squash (sliced into half-moons about 1/4 inch think)
    1/4 zucchini (sliced into half-moons about 1/4 inch think)
    1/3 red onion (diced)
    Herbs de Provence
    Olive Oil
    Vegetable stock

    I sauteed the onion in the oil until they start to get translucent, about 2 minutes, then added the squash and zucchini, sprinkled with the herbs, and sauteed another couple minutes. I turned the heat down to medium-low and put the fish on top of the bed of sauteed veggies in the pan. Sprinkled with some more herbs. Next, I poured about 1/2-2/3 of a cup of stock into the pan, making sure to baste the top of the fish with it, and brought it all to a boil (it helps if you’ve just made the stock and it’s already hot).

    Again, back the heat to low-medium-low, covered and cooked about 6-8 minutes, until the fish was done. I plated the fish and strained the veggies out of the remaining broth (which you can return to your stock pot for extra flavor, if you don’t mind a little fish in your veggie stock). I served them immediately.

    Now, I actually ate my salad (dressed with olive oil and seasoned rice vinegar) while the fish was cooking, because I was hungry and dammit it was my date.

    I plated the fish, veggies, and soup at the same time. The soup was really just all the veggies that cooked in the stock removed to a bowl with a slotted spoon and then the bowl filled with the stock and finished with some fresh garlic croutons. Bloody delicious I tell you!

    So, after salad and soup, I ate my fish, which was really, REALLY good. I have to say I feel pretty smug about that – tender, moist, and so rich with steamed/poached-in flavor. The veggies were fantastic too.

    It being a date, I wanted to make the best impression, so I had also pulled from my fridge a couple of awesome cheeses (a stinky blue one and a hard, nutty tomme of some kind, both from the Eastern Market cheese lady), so I had those on baguette next. And then, for dessert, I went with simple-is-best (because at this point I was getting lazy), and had Mexican table chocolate shaved over a scoop of vanilla ice cream.

    At the end of the day, I would totally give me a second date…and all told, there is now a ton of awesome veggie-with-a-hint-of-fish stock in my freezer, ready for such an occasion.

    -MAW

    [ad]

  • 29May


    Falafel Batter.

    If I might paraphrase (500) Days of Summer:  This is a story of boy meets chickpeas.  But you should know up front – this is not a dinner story.

    On a recent weekend, my beautiful wife and I were dining out and she mentioned that she had a craving for falafel.  I love good Mediterranean food – you all have seen my write-up of the Cava Mezze Grill in Tysons Corner Center, and Plaka Grill in Vienna is another favorite among my friends at church.  And any longtime resident of the area has to have tried out one of the many Lebanese Taverna locations in the DC region.  For the uninitiated, though, falafel is a fried entrée made of ground chickpeas and spices, usually served with hummus or tzatziki sauce on a pita. 

    Falafel Balls

    I first dug up a recipe.  A few looks around the Web found any number of falafel recipes, but as I always place a premium on simplicity, I started with Mark Bittman’s recipe.  But Bittman called for dried chickpeas, and the shelves at my local Giant were bare.  They had plenty of dried red, pinto, and black beans (perfect for the next time I’m in a chili cookoff!) but no chickpeas.  Unfortunately, I think that’s where I first went wrong.

    A Bad Frying Attempt.

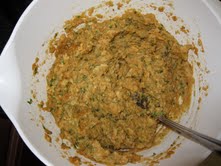
    I bought a 29-oz can of Goya chickpeas, drained them, and minced them in my food processor in batches.  I also chopped the onion, garlic, spices, and parsley and tossed all of that into the chickpea mixture with the last couple of ingredients.  I stirred the mixture together into batter, and I thought I was on the right track.  I even tossed in a tablespoon of flour, a tip that I saw in a number of recipes to keep the batter together as it fries.

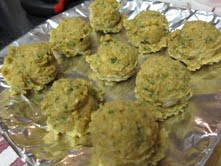
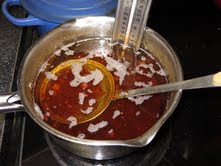
    I pulled out a disher and scooped out a batch of falafel balls.  Most recipes I saw suggest forming them into ping-pong ball-sized fritters, which I thought would work well.  I heated a saucepan with vegetable oil to 350 degrees, and once it hit temperature, I dropped two fritters in.

    Hot Oven Couldn't Help.

    And that is where my errors caught up with me.  The oil started bubbling furiously, as it usually will do when frying.  But when I dropped a spider into the oil to fish out the falafel, the batter had completely disintegrated.  And that was when I knew that we weren’t having falafel for dinner that night.

    I’m not sure if it was the canned chickpeas that did it, or the fact that my food processor is small enough that I had to chop everything in batches.  I may have over-minced the chickpeas, or it may have been that they were so wet that they wouldn’t stick together enough when faced with hot oil.  In any case, the oil was ruined and I scorched my saucepan.  I’ll have to try again sometime soon.

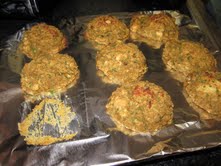
    All was not lost, however – I had one final thought before I gave up.  I dropped a few falafel balls onto a roasting pan and set them in a blazing hot oven for about 20 minutes, hoping that the dry heat might achieve something like the hot oil’s crisping effect.  Alas – while the outsides browned, the insides remained decidedly moist, and my experiment had truly failed.

    Let me know in the comments if you try out a falafel recipe more successfully than I did, or if you have any thoughts on what went wrong for me!

    Falafel

    Adapted from Mark Bittman’s “Recipe of the Day,” February 12, 2008

    1 29 oz can chickpeas

    2 cloves garlic

    1 small onion

    1 tsp coriander

    1 tbsp cumin

    ½ teaspoon cayenne pepper

    1 cup parsley leaves

    1 tsp salt

    ½ tsp baking soda

    1 tbsp lemon juice

    Frying oil

    Drain chickpeas.  Mince all ingredients except frying oil in your food processor, working in batches if necessary.  Adjust seasoning and spices to taste once the batter comes together.  Add a tablespoon or two of flour if the batter is too wet to form.

    Heat the oil to 350 degrees.  Fry falafel balls for about five minutes.  Serve on a heated pita with hummus, tzatziki, and other toppings as desired. 

    -HML

    ——————

    Check out my friend Ami’s Costa Rica Tours and don’t forget to use the code “TOUCAN” to save money. He has some group tours that you can join, including an upcoming August tour, and I hear that airfare to Costa Rica is inexpensive right now for August.


    -JAY


    Permalink Filed under: Recipes Tags: , 1 Comment
  • 22May

    Here’s a tip for fine dining restaurants:  keep an eye out for desserts made without chocolate.  I love a good chocolate torte or ganache-covered cake as much as the next man, but in my experience, pastry chefs really enjoy the chance to do something different with their dessert menus.  One of the best desserts I’ve ever had was a carrot cake at the Chef Geoff’s location in Tysons Corner – while it’s a relatively standard dessert choice, it was presented beautifully and the cream cheese frosting was amazing.  It’s those kinds of hidden gems you can often discover by venturing beyond the top of the dessert menu – and your adventurousness will be rewarded.

    The best part about desserts without chocolate is that they’re often doable at home in some form or another.  I’m thinking about fruit desserts here – the produce department in most grocery stores this time of year is absolutely overflowing with high-quality fruits, and making a fantastic dessert is easily within reach.  Anyone can buy angel food cake and serve strawberries and whipped cream right now – which, incidentally, I do recommend for a popular choice for your guests in a pinch – but it’s not too difficult to go a bit further than sliced strawberries on pre-made cakes!

    Naturally, of course, making desserts presents another challenge:  the calories.  Strawberry shortcake is actually a relatively healthy choice, but it’s easy to load up on butter and sugar any time you’re making a more elaborate dessert.  A pie is usually a good choice when you’ve got a surplus of fresh fruit around, but that can also take a decent amount of time and effort.  A tart is supposed to be a bit easier than even a pie (no top crust, right?) but the dough can be tricky.  And a cake is even worse than those.  No, I was looking for a recipe that would let me enjoy my bounty of fresh strawberries without soaking them in sugar syrup, spending an hour rolling out pie dough, or dunking them into fondue chocolate.  (That last one is also a great choice for guests, but it’s obviously not low-cal…)

    When I first came across this recipe, I saw it was made with pomegranate juice, but I couldn’t find any at the store – either my local Giant isn’t quite as hipster-credible as I thought, or they were out of stock.  I adapted the recipe to use apple juice instead.  There’s more natural sugar in apple juice, so I cut back on its recommended ¼ cup of sugar, but the underlying method used here is sound.  By making a fruit puree and a little syrup, blooming some gelatin, and adding some Greek yogurt, you end up with a quick, easy strawberry mousse – it comes together in 10-15 minutes (though it needs to be chilled for a while longer) and makes for a sweet and tart weeknight dessert.

    This time of year, you simply can’t go wrong with all the fresh fruit at the store.  A weeknight recipe like this is an easy way to use up that pile of produce with a clear conscience.  And since it’s low-cal, you don’t need to feel guilty about keeping a whole bowl for yourself!

    Weeknight Strawberry Mousse

    10 ounces fresh strawberries, hulled

    1/8 teaspoon salt

    1 envelope unflavored gelatin

    ½ cup apple juice

    7 oz 2% Greek yogurt

    2 tbsp sugar

    In a food processor or blender, puree the strawberries with the salt.

    “Bloom” the gelatin in a small bowl with ¼ cup of apple juice – just sprinkle it over the top and let it sit for five minutes or so.

    Whisk together the other ¼ cup of apple juice and the sugar in a small saucepan over low heat until warm.  Stir the bloomed gelatin into the saucepan and cook over low heat for about 1 minute until the gelatin dissolves.

    Add the gelatin mixture to the strawberry puree and blend (or process) until combined.  Add the yogurt and blend just until mixed.

    Spoon into dessert bowls and refrigerate for a couple hours or until firm.  Top with whipped cream and enjoy!

    -HML

    ————————–


    Check out my friend Ami’s Costa Rica Tours and don’t forget to use the code “TOUCAN” to save money. He has some group tours that you can join, including an upcoming August tour, and I hear that airfare to Costa Rica is inexpensive right now for August.

    -JAY

  • 18May

    The farmers markets have started up again, and I am (as usual) ecstatic. Wandering through last week, I saw a big pile of sunchokes (a.k.a. Jerusalem artichokes, which doesn’t sound as nice) next to a bunch of lovely golden beets. I immediately remembered that I had a lemongrass stalk sitting in my fridge lonely for a home, and a scheme was hatched.
    You’ll need:

    • 1 large leek
    • About a pound of sunchokes
    • About 2 tbs. finely chopped (use a blander if you’ve got one) lemongrass
    • 2 cups stock (I used water with vegeta, herbs de provence, celery
    • salt, white pepper, and fish sauce)
    • 1 cup water (I boosted mine with about a 1/2 tsp of Bragg’s)
    • 1/4 cup heavy cream (plus more to taste)
    • 2 tbs butter
    • 1 tbs olive oil
    • 1 tsp truffle oil
    • Fresh ground pepper
    • Tiny pinch of nutmeg
    • Garnish with sumac, if you like.
    • Golden beets (optional)

    Caramelize the thinly sliced leeks in the butter and olive oil (about 20 mins on med-low heat), then stir in the lemongrass. Add scrubbed sunchokes, cut into 1″ or so chunks,as well as your stock and water. Bring to a low boil, then back off the heat to medium (or, preferably, med-low), and simmer until the sunchokes are fork-tender (but not mushy). This takes at least 20 minutes – longer if you use lower heat (which I recommend). Somewhere in this time, stir in the nutmeg (to taste) and truffle oil.

    Remove from heat and blend (I used my nifty immersion blender, but a regular one will do fine). If you have a china cap, it might be nice to make the soup an even texture, but I kinda like the roughness of a puree. Finally, stir in the cream and add pepper (salt too, if you must). Serve, topped with a sprinkle of sumac.

    The result is delicious. Adding the lemongrass really brightens up the dish, and makes the nutty sunchokes stand out even more, I think. As good as it was the first night, piping hot, I may have liked it even better cold.

    Temperature is only one possible variation here. The first (and best, but only on the hot soup) is where the beets come in. Scrub and slice your beets very (very!) thin, and toss them in the over at about 350 until they crisp up. Then, toss them with a tiny bit of olive oil and sea salt, and they make a really pretty topping for the soup, adding a nice crunch as well.

    For future versions, I may try roasting the sunchokes beforehand to give it an earthier, sweeter flavor. I think this also would be a great accompaniment to a braised pork shoulder or short rib.

    Enjoy!!!

    –MAW

    [ad]

  • 13May

    Fresh Asparagus.

    It’s springtime!  Love is in the air, and the produce section at your local grocery store is probably overflowing with great fruits and vegetables.  We’re a bit spoiled these days in that we can get almost any type of produce year-round, but it’s this time of year that a wonderful bounty of fresh, high-quality stuff hits the produce department.  Those of you with CSA subscriptions will be enjoying your weekly deliveries soon enough, but if you’re looking for good vegetables, there’s plenty to be had, even at the local Giant, Harris Teeter, or Safeway.

    Despite its (deserved) reputation for giving some people a distinctive aroma during a certain bodily process after eating it, I’m a big fan of asparagus.  But not how it’s usually cooked – I’ve been the victim of boiled-to-death asparagus too many times to count.  That product is not enjoyable at the dinner table – so tender it slides off the fork, with a nasty off-green color and a strong odor that overpowers the palate.  Sure, it’s nutritious, but we shouldn’t be condemned to suffering through our vegetables!  In a way it’s similar to broccoli – too many people have terrible memories of being forced to eat their broccoli by their parents, so they avoid it later on when they actually control their home menu.

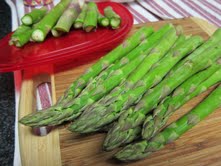
    Prepped and Snapped Asparagus.

    But we have better ways of cooking vegetables!  We don’t have to boil them into submission; we can apply better techniques and enjoy them quite a bit more.  And before I lose you here – you don’t have to spend hours doing it, either.  High-quality produce doesn’t need to be shepherded through difficult sauce-making or other rigorous techniques.  While asparagus goes very nicely with Hollandaise sauce in classical French cuisine, those tricky emulsions still have me scared.  And when I’m making dinner for my wife, I’d rather not worry about a sauce breaking – I want my dishes to be ready reliably.  (The same holds true for any of you guys attempting to woo a lady with your cooking, which is a tactic I highly recommend.  Date night recipes shouldn’t be too labor intensive, and should be fail-safe!)  In any case, you have two big points to remember when getting high-quality vegetables into your kitchen:

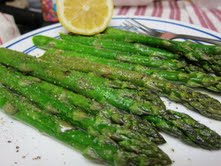
    Cooked and Seasoned Asparagus.

    #1:  Prep.  This is probably the most important point for vegetable cookery, as you simply can’t bring veggies home from the store and toss them in the pot (most of the time, anyway).  With asparagus, you’ll want to “snap” them – bend the stalks along the length until the woody base naturally snaps off.  You wouldn’t want to eat that section anyway!  You’ll be left with tender portions of the green stalks that won’t at all remind you of biting into a tree.

    #2:  Method.  My favorite way to cook asparagus without absolutely killing it is high-heat roasting.  Many restaurants recommend blanching veggies first, but they mostly do that in order to save time on the line.  In the home setting, it’s easy enough to roast your asparagus all the way through without having to boil a pot of water.  It’ll take a little longer, but since you’re not firing dishes out every five to ten minutes, you can afford to wait.

    The beauty of asparagus is that it’s got a relatively strong natural flavor, meaning it will stand up to seasonings and spices pretty well.  You can play around with the flavor elements in this recipe as you like – some sources I’ve seen recommend sprinkling the cooked asparagus with nutmeg or allspice as it comes out of the oven.  I’ve also seen suggestions for using lemon zest, but I prefer the stronger flavor of fresh lemon juice.  You don’t want to drown your poor veggies, but a solid squeeze over the plate after they come out of the oven, followed by seasoning and whatever spices you’d like to enjoy, will elevate the dish far beyond your dreaded memories of the family dinner table in your youth.


    Roasted Asparagus

    1 bunch asparagus stalks

    Olive oil

    1 lemon

    Salt and pepper


    Preheat your oven to 400 degrees.

    Prep your asparagus stalks by snapping off the woody lower ends and washing thoroughly.  Toss with a tablespoon or two of olive oil until well coated and lay out in a single layer on a roasting pan or oven-safe plate (such as Pyrex).

    Roast for 5 minutes, then check the tray and turn any stalks that appear to be browning quickly.  Roast for another 5-7 minutes (depending on how thick your stalks are), then remove from the oven.

    Squeeze fresh lemon juice over the asparagus, then sprinkle generously with kosher salt and fresh black pepper.  Optional:  omit lemon juice and sprinkle with nutmeg or allspice.  Basil chiffonade is another nice option if you’ve got fresh herbs available.

    Enjoy!

    -HML

    —————————————-

    Check out my friend Ami’s Costa Rica Tours and don’t forget to use the code “TOUCAN” to save money. He has some group tours that you can join, including an upcoming August tour, and I hear that airfare to Costa Rica is inexpensve right now for August.

    -JAY

  • 14Apr

    My wife and I recently took a cruise out of Baltimore to the Caribbean.  When we started planning it last year, I was pleasantly surprised to find that cruise ships sail out of the port in Charm City – after all, that means we DC-area residents don’t have to fly down to Florida, nor pay for a hotel room the night before departure.  And that meant no checked baggage fees!

    Eating is a major part of any cruise vacation, and this voyage was no exception.  Along with the main dining room aboard, the ship offered complimentary room service, a casual buffet restaurant open most hours of the day, and assorted snacks and late night eats throughout the ship.  At dinner each night in the main dining room, the wait staff became notorious at our 8-top table for bringing out multiple dishes during every course.  Seriously, by just asking if we should order one entree or another, they’d bring both!  We were on the second seating, which I’m pretty sure meant they were trying to clear out their inventory each night, but I wasn’t complaining.  Overall, the food was good – and there was plenty of it! – though I think it’s fair to call the food above average overall rather than great.  When cooking for 2,000+ guests at a time, even when spread out over two seatings, I imagine it’s virtually impossible to cook a la carte or spend too much time on any one plate.

    Not that I’m complaining, of course; I greatly enjoyed the vacation.  While I’m studiously avoiding any product placement here, I think it’s a great option for you local food lovers, especially if you want to try out a cruise without the added complexity of flying.  The escargot served one night were better than I ever remembered sampling with my father years ago, and the braised lamb shank served on an Italian-themed night was fall-apart tender and not at all overpowering.  The desserts were quite nice as well – several of us tried a flourless chocolate cake one night that was so texturally smooth and filled with chocolate flavor that my tablemates decided it was more like fudge than anything resembling a cake.  Their tiramisu was excellent, with a strong coffee flavor and the liqueur managed not to completely overpower the dish.

    We had a slight challenge when we returned home, though.  Aside from the inner-ear confusion that made me think my couch was experiencing some pitching and rolling, we had barely anything in the house to eat when we arrived, and I had little inclination to cook much of anything.  Yet I also didn’t really want to go out to eat – we’d functionally been eating out for the past seven days, and I think I craved a meal that I could put together at home.  And when I finally got to the grocery store, I was inspired by a dish I’d seen at dinner one evening on board the ship.  My wife had ordered Parmesan-crusted turkey tenderloin and found it to be superb, and I wondered if I could recreate anything similar at home.

    I made up the following recipe as I went along, and as I so often do, I placed a high premium on minimizing my labor.  I had this dish prepped and in the oven in less than 10 minutes, meaning it’s just barely a 30-minute meal with the cooking time.  And it turned out quite nicely, even given its relative amateurism.  Look, I know well that I’m not going to open a restaurant with this recipe, but this came together quickly and was surprisingly good.  I think this could be good with any number of other herbs and spices – I think chopped rosemary or sage would go really nicely with the Parmesan – so if you try it out, I’d love to hear from you about any variations.

    Parmesan-crusted Chicken Cutlets

    2 boneless, skinless chicken breasts

    2 eggs

    1 cup grated Parmesan cheese (plus more if needed to coat chicken cutlets)

    Dried Italian herbs or other herbs/spices as preferred

    Line a sheet pan with foil, then set a cooling rack inside.  Preheat your oven to 350 degrees.

    Beat the eggs with a tablespoon of water for a few strokes until the mixture is generally uniform in color.  Lay each chicken breast flat on a cutting board and carefully hold them down, one at a time, with your spare hand, while you slice through them parallel to the cutting board.  You should end up with four cutlets of relatively even thickness, and if you’re so inclined, you can even pound them with a kitchen mallet.

    Dunk the chicken cutlets in the egg wash, roll them in the grated Parmesan, then set on the prepared cooling rack.  The cheese won’t stick quite as firmly as breadcrumbs would, so feel free to sprinkle more cheese on the cutlets once they’re on the rack.

    Top each cutlet with a dash of kosher salt and a generous sprinkling of dried herbs.  I used dried Italian herbs from my pantry, and they went very well with the Parmesan.  Make sure to cover the whole top of the cutlet evenly – you don’t want to drown it in herbs, but they’ll taste better if you get the cheese and the herbs in every bite.

    Cook for 15-20 minutes depending on the size of your cutlets – the chicken breasts I’d bought were from DelMarVa and were quite large, so I went for 20 minutes.  Then set your oven to broil for 3-4 minutes to brown the tops.  Keep an eye on them here, but make sure the cutlets are fully browned – I found that the best flavor was in the cutlets with well-browned tops and plenty of herbs.

    Serve with a vegetable – and rejoice in a 30-minute dinner.

    Enjoy!

    -HML

    —————————

    Check out my friend’s Costa Rica Tours and don’t forget to use the code “TOUCAN” to save money. He has some group tours that you can join.

    -JAY

  • 12Mar

    Full disclosure:  the following recipe includes a cake mix.  Whew.  I feel better getting that off my chest up front.

    Any cook faces the need to balance time investment with quality.  This calculation isn’t foreign to professional chefs, who have dozens of tricks and shortcuts at hand every night to expedite restaurant service.  After all, when you have a team of prep cooks, making demi-glace from scratch becomes quite a bit easier!

    For the home cook, though, striking that balance can be trickier.  I have yet to make fresh pasta at home, for example, because it just doesn’t seem to be worth the effort.  Have you seen Alton Brown’s homemade ravioli episode?!  It is NOT a quick technique compared to, say, buying frozen ravioli and tossing them into salted water for a few minutes.  (Our Italian readers should feel free to flay me in the comments for that…)

    And that’s not the only example – I love making my own pizza dough when I have the time, but the 2-hour rise really throws a wrench into my dinner’s timing.  I also enjoy making roasted broccoli for a dinner party – it doesn’t get much simpler than olive oil, salt, pepper, and a broiler – but it’s quite a bit messier than simply steaming a crown or two for a few minutes, and there are always times when my desire to avoid a messy kitchen will win out.

    I was perusing some recipes from my sister’s kitchen recently and it struck me:  I’m sure we all have a few family recipes that crop up again and again at the dinner table because they’re just so darn easy.  One set of family friends I have, for example, made spaghetti and meat sauce every Monday night for dinner.  It was a wonderful family ritual – the sauce came together quickly, boiling pasta is a snap, and then you just have to warm up some bread (sourdough rounds were a favorite in that house).  Needless to say, it was also a cheap way to feed three growing children, and in fact, the kids’ friends would often stop by for spaghetti even when the kids were all off at college! It was that popular!  To this day, making spaghetti with a red sauce brings me back to innumerable evenings over there, finishing homework and waiting for dinner.

    This recipe is an example of that kind of nostalgic, quick and easy cooking for me.  It’s a dessert that pulls together easily – about 30 minutes of work for a whole pan of chocolate squares – and always makes a splash.  Sure, it’s not quite as classy as you’ll get out at a restaurant, but I’ve never failed to impress with it.  It’s an incredibly rich kind of turtle brownie, so make sure your tasters know what they’re getting in to up front.  I prefer these without nuts, but it wouldn’t hurt to top with pecans or walnuts before baking if you’re so inclined.  The recipe itself is the height of simplicity – 5 ingredients and a 9×13 pan, and you’ll be the toast of your coworkers (or you’ll be cursed by anyone on a diet…) Either way, they’ll be talking about you!

    I also strongly suggest cutting these small and sharing widely.  Seriously, there’s a stick of butter in here, and while your inner Paula Deen will love it, the sugar crash can be brutal if you have too many.  I swear, though – totally worth it.


    Caramel Layer Chocolate Squares (or Turtle Brownies Without Nuts, but this is a family site)

    Ingredients

    1 box devil’s food cake mix

    2/3 cup evaporated milk, divided

    1/2 cup butter, melted

    14 oz package caramels (the ones that come individually wrapped)

    12 oz chocolate chips


    Preheat your oven to 350 degrees.

    Unwrap all of the caramels and place in a saucepan over low heat with 1/3 cup of the evaporated milk.  Stir until melted and smooth, then set aside.

    Combine cake mix, 1/3 cup evaporated milk, and the melted butter.  Mix until uniform.  Divide the resulting dough into two parts and set one of them aside.  Press the remaining half of the dough out into a 9 x 13 pan using a spatula.  You’ll have to spread the dough fairly thin to cover the whole pan, but don’t worry – it will rise nicely as it cooks.  Also, don’t worry about greasing the pan – there’s enough butter in here to keep things non-stick.  Bake for 6 minutes, then remove from the oven.

    Sprinkle the chocolate chips evenly over the cooked crust.  Pour the caramel mixture over the chocolate chips, again, as evenly as possible.  Then drop crumbled pieces of the remaining dough over the caramel.  Try for even distribution, though it’s not necessary to fully cover the caramel.  They’ll look quite nice with spots peeking through.

    Bake for 20 additional minutes, then allow to cool completely before cutting into bars.  I do mean completely, by the way – these bars will be almost liquid when they come out of the oven.  Allow at least an hour in a relatively cool kitchen – I usually leave them overnight and put them on a plate for my officemates the next morning.

    Enjoy!

    -HML

    [ad]

  • 04Mar

    This week, I had a craving for a good homemade burger.  I’m not hugely picky with my burgers – I’ve tried a couple of the famed gourmet burger joints in the DC area, and they’re generally quite good, but I prefer one I can make up at home, just the way I like it.

    But I’m faced with a burger problem:  my apartment complex doesn’t allow residents to have grills.  They’ve got a couple available to all residents by the community room, but I never end up wanting to make the trek over there.  And when the weather’s bad?  Forget it.

    Surely, I thought, I’m not condemned to skillet-seared burger patties for all my days?  I like a good skillet-cooked burger, but it’s so messy.  Grease gets everywhere on my stove, and even with my biggest skillet, I only have room for three, maybe four patties at the most.  I suspect many of our readers around DC and the surrounding area are in the same boat – I’m told it’s illegal to put a grill on a balcony in Arlington County, for example – and I figured there had to be a kitchen hack that I could put to good use.  I considered buying Liquid Smoke or trying out a grill pan, but then I came across a suggestion to try roasting.

    I was initially skeptical about the technique, as a good burger is usually seared or grilled at high heat to produce a beautifully browned, flavorful crust.  But the high heat means that it’s easy to overcook your burger, leaving you with a dried-out, inedible meat puck.  I’ve been to far too many family functions with those.  And forming them is especially important when grilling – if you don’t put a dimple into the patty, you’ll end up with the dreaded “flying saucer”-shaped burger.  Roasting, though, gets around a couple of those problems.  High-heat roasting still gives you some of that nice browned outside, though obviously not as much as you’d get on the grill.  But the real advantage is that it keeps the burger flavorful and moist.  And best of all, it’s an incredibly easy method.  I put my trusty probe thermometer in the biggest patty and then put my feet up until they hit temperature.

    Give this technique a try next time the stove is clean and you don’t want to mess it all up.  I also think this would be a great way to cook for a crowd – 8 burgers could easily fit on a roasting pan, and since they only take 10-12 minutes to cook, you could keep more batches coming to feed a bigger group.  You won’t be stuck outside watching the grill the whole time, and you’ll be better company for it!

    Roasted Hamburgers

    Inspired by The Amateur Gourmet’s review of Molly Steven’s cookbook, All About Roasting: http://www.amateurgourmet.com/2011/10/oven-roasted-hamburgers.html

    2 lbs ground chuck

    1 ½ tsp kosher salt, plus more for the roasting pan

    ½ tsp smoked paprika

    ½ tsp onion powder

    1 tbsp Worcestershire sauce

    Hamburger buns and your favorite toppings

    Preheat the oven to 475 degrees.  Line a roasting pan with a sheet of foil and sprinkle generously with kosher salt to absorb drippings, then set a cooling rack into the pan.

    Break the beef up into small chunks in a large mixing bowl.  Add the salt, smoked paprika and onion powder (and feel free to substitute other spices if preferred – seasoned salt or garlic powder would be nice here, too).  Mix gently with your hands and divide into 6 equal portions.  You can use a scale to be exact if you’d like, but I just eyeball it.  Shape into patties (gently; work them too hard and your burgers will toughen up) and lay out on the cooling rack in the roasting pan.  Apply a healthy dollop of Worcestershire sauce to each patty and insert a probe thermometer into one burger.

    Roast for 10-12 minutes or until the burger reaches about 135 degrees for medium-rare to medium.  Add your favorite cheese if desired and put back into the oven for a minute or so to melt.  I’m a cheeseburger purist – my burgers come with American, darn it – but you can change it up if you’d like.  Serve on a bun (or not!  We’re still low-carb in my household!) and garnish with pickles, onions, tomatoes, or any other burger topping you’d like.

    Enjoy!

    -HML

    [ad]

  • 23Feb

    Cooking for anyone on a low-carb diet is challenging – after all, American grocery stores have more carbohydrates available nowadays than at almost any other time in our history.  Sugar and wheat flour are the biggest culprits, but unless you check labels religiously, you’ll inadvertently serve carbs with every meal.  Going low-carb means eating lots of protein and fresh vegetables, avoiding many fruits (natural sugars aren’t good either), eliminating most breads, and never, under any circumstances, cooking up big, steaming bowls of pasta.

    But this is a challenge.  Seriously, any time you’re talking about a fundamental change to your diet, you’ll end up with cravings.  In some ways, it’s almost karmic:  if you tell yourself that you can’t have cookies, one of your coworkers will probably ask if you want to order Girl Scout cookies.  (What, is that just me?)

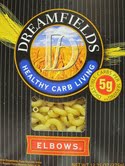
    I came across Dreamfields pasta on a suggestion from my sister-in-law.  She mentioned that she’d found a new brand of pasta that was actually okay to eat when trying to cut down on carbs.  And this, friends, is revolutionary.  A low-carb diet means, at least in the early phases, cutting down to 20 grams or less of carbohydrates in a day.  And that may not sound like much until you check the label and realize that one slice of bread has 20 grams of carbs on its own.  It forces a bit of an adjustment to one’s cooking!

    But as it turns out, you can fulfill that craving without completely destroying your Atkins-friendly diet.  Dreamfields claims that one serving of their pasta, which I found in three different shapes at my local Giant, has just 5 grams of net carbs.  I won’t pretend to know how exactly how they do it (they claim that their patented pasta blend “…creates a protective barrier to reduce starch digestion in the small intestine,” which isn’t exactly something I want to examine closely!) but I thought it’d be worth a look.

    As with so many other specialized diet foods, this stuff isn’t exactly cheap.  My local store has a 13.2 oz box of spaghetti for $2.89, while a 16 oz box of Barilla spaghetti costs just $1.25, and Ronzoni’s whole-wheat spaghetti goes for just $2.29.  That’s quite a premium, but if you’re eating low-carb, you’re spending more on your food anyway.  Just be aware of it.

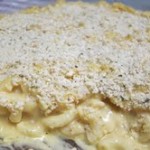
    We tried out two applications for this pasta – a basic angel hair with marinara sauce and an old favorite recipe for comfort food, a variation on Mark Bittman’s baked macaroni and cheese (recipe below).  I think our impressions of the angel hair marinara were colored by it being the first pasta meal we’ve had at our house in months – it’s no exaggeration to say that we loved it – but when I made baked macaroni and cheese, I tested it on one of my wife’s friends to make sure that we weren’t just deprived and loving it.  All three of us cleaned our plates that evening.

    The beauty of this product (and I will admit that I’m neither Italian nor a pasta expert) is that it tasted like a near-perfect substitute.  I didn’t do anything special when I made it; I simply salted the water and boiled as long as the package indicated (5 minutes for the angel hair and 8 minutes for the macaroni).  No olive oil or family cooking secrets – this was about as simple as it could get, and it worked extraordinarily well.

    If you’re tired of avoiding your carbohydrate nemeses, Dreamfields is worth a shot.  You’ll pay a premium for it, but in our house, it was definitely worth it.

    Enjoy!

    -Michael (HML)

    Baked Macaroni and Cheese

    2 ½ cups milk

    2 bay leaves

    1 lb elbow macaroni (Bittman also suggests shells, ziti, or other cut pasta)

    4 tbsp butter, plus extra for greasing the pan

    3 tbsp all-purpose flour

    2 cups grated cheese – I prefer sharp Cheddar, but any flavorful cheese will do

    ½ cup grated Parmesan

    ½ cup bread crumbs – I used panko with dried Italian herbs)

    Preheat the oven to 400 degrees.  Boil salted water in a medium saucepan or stockpot.  Grease a 9×13 glass baking dish with extra butter.

    Heat milk over low heat with bay leaves for five minutes or so until hot.  Remove bay leaves and set milk aside. Boil the pasta until one minute shy of al dente – for the Dreamfields pasta, this meant boiling for 7 minutes – then strain and rinse in cold water to stop cooking.  Set aside in a medium work bowl.

    In a clean saucepan (and this can be done using just one pan for all of these tasks, though you’ll need to wash it out repeatedly), melt the butter over medium-low heat.  Add the flour and stir with a whisk until smooth.  (Technique note:  for any of you newbies out there, you’re making a roux, the base for many traditional French sauces).  Cook for about five minutes until the mixture is brown, whisking often.  Add the milk in ¼ cup increments, whisking until smooth with each addition, and don’t let the mixture sit over the heat until almost all of the milk is added.  Once smooth and fully incorporated, add both cheeses and stir until melted and smooth. 

    Add the sauce to the pasta and stir to combine.  Adjust seasoning to taste and add some freshly ground black pepper if you’re so inclined.  Pour the mixture into the prepared pan and top with bread crumbs, then bake for about 15 minutes.

    [ad]

  • 15Feb

    Chocolate Macarons

    When I first started writing for dcfüd, I mentioned that I’d be writing about my successes and my failures.  And much like the title screen for (500) Days of Summer did, I have to warn you up front:  this is not a success story.

    A while back, I tried making macarons, those small, French sandwich cookies made with almond flour, egg whites, and a lot of luck.  They didn’t work out for me – the batter ran out of my piping bag like water, the cookies ended up much bigger than I’ve ever seen commercially, and though they tasted okay, they just didn’t look very good.  I’ve been told that I’m a bit of a perfectionist professionally, and sometimes that bleeds over into my cooking.  But it’s for good reason – most professional chefs that I’ve read offer some variation on the cliché that we “eat with our eyes first” – so presentation really does matter.

    Go on: take a look at the photos of the “macarons” entry at Wikipedia (http://en.wikipedia.org/wiki/Macarons).  I’ll wait.  Notice the beautiful pastel colors (though those are created by artificial food dyes), the symmetrical cookie halves, and the slight “foot” created during the bake?  Those are the hallmarks of a professionally made and well-executed macaron.  I wanted to try them out again this week.  (And I’m still competing with my coworkers over desserts, so this would be a coup if I could pull it off!)

    Step one:  sources and methods.  One of my go-to references for baking and desserts is the Baking Bites blog (http://bakingbites.com/), run by a Los Angeles-based author named Nicole Weston.  She posted her recipe for chocolate macarons with vanilla buttercream filling recently (http://bakingbites.com/2012/01/chocolate-macarons-with-vanilla-buttercream-filling/), and once I saw it, I put almond flour on my grocery list.  Fair warning:  one pound of that ran more than $10 at my local supermarket.  There’s not a whole lot of almond flour in one batch, so you can certainly try again, but don’t bother trying to chop your own almonds into flour in your food processor – you’ll end up with chunks rather than the fine powder you need.

    Step two:  prep.  I set up two roasting pans, but I only have one SilPat, so I lined the other one with parchment paper.  One equipment note here – every macaron recipe I’ve ever seen has specified measuring ingredients by weight rather than by volume.  This is a great tip for baking generally, and I’m told that most professional chefs use scales in their pastry work.  After weighing out the dry ingredients, I whisked them together in a mixing bowl and started separating my eggs.  Once the sugar syrup went onto the heat, the recipe started moving quickly, and it might be then that it got away from me.

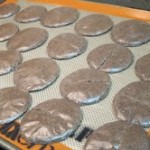
    Step three:  failure.  Maybe macarons are my personal unicorn, but I just couldn’t get them right this time, either.  The almond dough came together fairly easily, but the Italian meringue that the Baking Bites recipe suggests either wasn’t whipped enough or not folded gently enough into the batter.  Not to blame the recipe, of course – those would be my fault!  After piping and baking (and my pastry bag skills leave something to be desired…), I found some flat macarons with cracked shells when I opened the oven.  Several of them stuck to the pans despite my best efforts with silicone and parchment paper, but I’m told that’s not unusual.  And worst of all, my frosting went wrong, looking grainy and brown rather than nicely whipped.  I tend to use a bit more vanilla in my desserts than recipes call for, and I think my vanilla extract might have done a bit more coloring than I wanted it to here.  Mea culpa!

    But all was not lost – I pulled a container of dark chocolate frosting out of the pantry and started sandwiching the cookies together with a dollop each.  They’re not the most visually appealing macarons I’ve ever seen by a long shot, but my beautiful wife (God bless her!) assured me that they’re quite good.  We’ll see what my co-workers say.

    This dessert is a real challenge, so I’d love to hear about your experience with it or with other macaron recipes.  Let me know in the comments if you’ve managed to conquer the French.  Enjoy!

    Chocolate Macarons with Vanilla Buttercream Filling

    Recipe courtesy Baking Bites

    180 g almond flour/almond meal

    200 g confectioner’s sugar

    30 g cocoa powder

    4 large room-temperature egg whites, divided

    180 g sugar (granulated)

    ¼ cup water

    For vanilla buttercream: 

    1/3 cup room-temperature butter

    1 ½ tsp vanilla extract

    1 tbsp milk

    2 cups confectioner’s sugar

    Prep two roasting pans with non-stick surfaces, either SilPats or parchment paper.

    Sift together almond meal, confectioner’s sugar, and cocoa powder in a mixing bowl.  Using the paddle attachment, mix with two of the egg whites until a thick dough comes together.  Be sure to scrape the bottom of the bowl to ensure all of the dry ingredients are mixed.  Once the dough is together, set aside and wash out your mixing bowl.

    In a saucepan, heat granulated sugar and water to a rolling boil, whisking to ensure sugar dissolves.  Boil for at least 30 seconds.

    Back in the stand mixer, beat the other two egg whites until soft peaks form.  Then slowly add the syrup into the egg whites while continuing to beat on medium.  Be careful here, as the syrup is hot and the mixer will send it everywhere unless you’re cautious.  Once the syrup has been fully incorporated, beat until you have a thick, fluffy meringue, set aside and wash out the mixing bowl again (unless you’re lucky enough to own extras!)

    Stir about 1/3 of the meringue into the chocolate dough, then fold in the remaining meringue in a couple more additions.  Using a pastry bag or a zip-top plastic bag with a snipped corner, pipe the resulting batter out onto the pans in tablespoon-sized portions with about an inch between them.

    Let the piped batter sit for 20 minutes or so while preheating the oven to 350 degrees.  Bake for about 12 minutes, then cool on the sheet or a cooling rack before frosting and sandwiching.

    Vanilla Buttercream Frosting

    Beat the butter until soft, then add the vanilla extract, milk, and confectioner’s sugar.  Beat until light and creamy, then spoon or pipe between your cookie shells.  And if nothing else, keep a backup frosting in the pantry!

    -HML

    [ad]

Categories

Archives