• 15Feb

    Chocolate Macarons

    When I first started writing for dcfüd, I mentioned that I’d be writing about my successes and my failures.  And much like the title screen for (500) Days of Summer did, I have to warn you up front:  this is not a success story.

    A while back, I tried making macarons, those small, French sandwich cookies made with almond flour, egg whites, and a lot of luck.  They didn’t work out for me – the batter ran out of my piping bag like water, the cookies ended up much bigger than I’ve ever seen commercially, and though they tasted okay, they just didn’t look very good.  I’ve been told that I’m a bit of a perfectionist professionally, and sometimes that bleeds over into my cooking.  But it’s for good reason – most professional chefs that I’ve read offer some variation on the cliché that we “eat with our eyes first” – so presentation really does matter.

    Go on: take a look at the photos of the “macarons” entry at Wikipedia (http://en.wikipedia.org/wiki/Macarons).  I’ll wait.  Notice the beautiful pastel colors (though those are created by artificial food dyes), the symmetrical cookie halves, and the slight “foot” created during the bake?  Those are the hallmarks of a professionally made and well-executed macaron.  I wanted to try them out again this week.  (And I’m still competing with my coworkers over desserts, so this would be a coup if I could pull it off!)

    Step one:  sources and methods.  One of my go-to references for baking and desserts is the Baking Bites blog (http://bakingbites.com/), run by a Los Angeles-based author named Nicole Weston.  She posted her recipe for chocolate macarons with vanilla buttercream filling recently (http://bakingbites.com/2012/01/chocolate-macarons-with-vanilla-buttercream-filling/), and once I saw it, I put almond flour on my grocery list.  Fair warning:  one pound of that ran more than $10 at my local supermarket.  There’s not a whole lot of almond flour in one batch, so you can certainly try again, but don’t bother trying to chop your own almonds into flour in your food processor – you’ll end up with chunks rather than the fine powder you need.

    Step two:  prep.  I set up two roasting pans, but I only have one SilPat, so I lined the other one with parchment paper.  One equipment note here – every macaron recipe I’ve ever seen has specified measuring ingredients by weight rather than by volume.  This is a great tip for baking generally, and I’m told that most professional chefs use scales in their pastry work.  After weighing out the dry ingredients, I whisked them together in a mixing bowl and started separating my eggs.  Once the sugar syrup went onto the heat, the recipe started moving quickly, and it might be then that it got away from me.

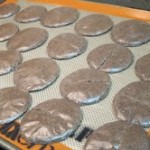
    Step three:  failure.  Maybe macarons are my personal unicorn, but I just couldn’t get them right this time, either.  The almond dough came together fairly easily, but the Italian meringue that the Baking Bites recipe suggests either wasn’t whipped enough or not folded gently enough into the batter.  Not to blame the recipe, of course – those would be my fault!  After piping and baking (and my pastry bag skills leave something to be desired…), I found some flat macarons with cracked shells when I opened the oven.  Several of them stuck to the pans despite my best efforts with silicone and parchment paper, but I’m told that’s not unusual.  And worst of all, my frosting went wrong, looking grainy and brown rather than nicely whipped.  I tend to use a bit more vanilla in my desserts than recipes call for, and I think my vanilla extract might have done a bit more coloring than I wanted it to here.  Mea culpa!

    But all was not lost – I pulled a container of dark chocolate frosting out of the pantry and started sandwiching the cookies together with a dollop each.  They’re not the most visually appealing macarons I’ve ever seen by a long shot, but my beautiful wife (God bless her!) assured me that they’re quite good.  We’ll see what my co-workers say.

    This dessert is a real challenge, so I’d love to hear about your experience with it or with other macaron recipes.  Let me know in the comments if you’ve managed to conquer the French.  Enjoy!

    Chocolate Macarons with Vanilla Buttercream Filling

    Recipe courtesy Baking Bites

    180 g almond flour/almond meal

    200 g confectioner’s sugar

    30 g cocoa powder

    4 large room-temperature egg whites, divided

    180 g sugar (granulated)

    ¼ cup water

    For vanilla buttercream: 

    1/3 cup room-temperature butter

    1 ½ tsp vanilla extract

    1 tbsp milk

    2 cups confectioner’s sugar

    Prep two roasting pans with non-stick surfaces, either SilPats or parchment paper.

    Sift together almond meal, confectioner’s sugar, and cocoa powder in a mixing bowl.  Using the paddle attachment, mix with two of the egg whites until a thick dough comes together.  Be sure to scrape the bottom of the bowl to ensure all of the dry ingredients are mixed.  Once the dough is together, set aside and wash out your mixing bowl.

    In a saucepan, heat granulated sugar and water to a rolling boil, whisking to ensure sugar dissolves.  Boil for at least 30 seconds.

    Back in the stand mixer, beat the other two egg whites until soft peaks form.  Then slowly add the syrup into the egg whites while continuing to beat on medium.  Be careful here, as the syrup is hot and the mixer will send it everywhere unless you’re cautious.  Once the syrup has been fully incorporated, beat until you have a thick, fluffy meringue, set aside and wash out the mixing bowl again (unless you’re lucky enough to own extras!)

    Stir about 1/3 of the meringue into the chocolate dough, then fold in the remaining meringue in a couple more additions.  Using a pastry bag or a zip-top plastic bag with a snipped corner, pipe the resulting batter out onto the pans in tablespoon-sized portions with about an inch between them.

    Let the piped batter sit for 20 minutes or so while preheating the oven to 350 degrees.  Bake for about 12 minutes, then cool on the sheet or a cooling rack before frosting and sandwiching.

    Vanilla Buttercream Frosting

    Beat the butter until soft, then add the vanilla extract, milk, and confectioner’s sugar.  Beat until light and creamy, then spoon or pipe between your cookie shells.  And if nothing else, keep a backup frosting in the pantry!

    -HML

    [ad]

  • 14Jan

    If you’re anything like me, your bookshelves and web browser bookmarks are stuffed with recipes you want to try, but just haven’t gotten to yet.  Weeknights probably get away from you as much as they do from me, which means that most nights, you probably don’t have the energy to pull together a culinary classic like beef Wellington or risotto Milanese.  And believe me, I sympathize.  I don’t have time for complicated, multi-course meals during the week, so I try something new when I can and stick to quick and easy favorites when I can’t.  I try to cook a bit more elaborately on the weekends, but sometimes it’s not worth it – seriously, have you seen the price of USDA Prime beef lately?

    JAY asked me write about my home cooking – that is, chiefly, my ever-present stack of recipes, my attempts to recreate the experts’ work and all the successes, failures and happy accidents that occur along the way.  I’m always looking for accessible, budget-friendly ways to keep cooking at home, and I’m quite thankful for the chance to write about it regularly.

    For my first recipe, I turned to a suggestion from my sister for a winter dessert:  Dark Chocolate Cream Pie.  My sister first obtained a version of this recipe from Rick Rodgers’ Thanksgiving 101, and I decided to make something similar for my wife on our first date a few years ago.  (Pro tip:  test out your cooking before you invite her over!  My roommates at the time loved getting to try out the results of my practice run through that dinner date).

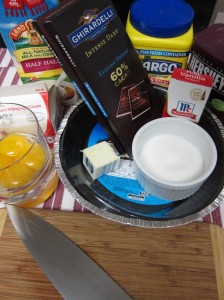
    The pie’s shell is the easiest place to play around with this recipe – you can certainly make your own pie dough, but I tend to buy pre-made crusts because (confession!) I honestly don’t like the crust very much.  I prefer the filling!  Don’t skimp on the good chocolate here, either.  Most neighborhood grocery stores have a selection of high-quality chocolate bars in the baking aisle and if you’re really feeling gourmet, you can certainly splurge on something from Whole Foods.  As a California native, I’m always partial to Ghirardelli chocolate.  Finish off with a dollop of whipped cream and some grated chocolate, and you’ll have a hit on your hands.  (Disclaimer:  No guarantees if you use it on a date!)

    Dark Chocolate Cream Pie

    Ingredients

    Pie shell of your choice, docked and baked (Note:  “Docking” is the process of maniacally stabbing the crust with a fork or pastry tool to prevent the dough from bubbling up while baking.  If you use an Oreo or other cookie crust, though, neither docking nor baking is necessary).

    3 cups half and half

    2/3 cup plus 2 tbsp sugar

    1/8 tsp salt

    3 tbsp cornstarch

    4 large egg yolks

    4 oz. high quality bittersweet or semi-sweet chocolate, finely chopped (Note x2:  Don’t skimp on the chocolate here.  Don’t use chocolate chips, either – the emulsifiers in the chips may help them hold their shape, but they don’t help the custard.  High-quality bar chocolate is best.)

    2 tbsp unsalted butter

    1 tsp vanilla extract

    1 cup heavy cream, chilled (Note x3:  The heavy cream is only necessary if you want to whip your own.  Cool Whip or its generic equivalent will work in a pinch.)

    Cocoa powder or chocolate shavings for garnish

    Directions

    Heat 2 ½ cups of half & half, 2/3 cup sugar and the 1/8 teaspoon salt in a saucepan.  Stir over medium heat until fairly hot and bubbles appear around edges of saucepan, then set aside off heat.

    Whisk together cornstarch and remaining ½ cup of half & half vigorously until dissolved – seriously, you’re not going to hurt anything, so make sure every last bit of cornstarch is dissolved.  Whisk in egg yolks one at a time until the mixture is uniform in color and textures.  Gradually whisk in sweetened half & half mixture, rinse out the saucepan and return the mixture to the pan.  Cook over medium heat, stirring frequently and scraping the bottom of the pan until the custard comes to a boil and thickens.  Be especially careful about hot spatters of custard as it heats up!  Reduce heat to medium low and stir constantly for one minute, and then remove from heat.  Add chopped chocolate, butter and ½ tsp vanilla and stir the mixture until the butter and chocolate melt completely.

    Pour custard into pie shell and smooth top (jiggling once or twice to remove air bubbles would be good too).  Allow the pie to cool, then refrigerate until serving.

    If making whipped cream:  Combine heavy cream, 2 tbsp sugar and ½ tsp vanilla in a large, chilled mixing bowl.  Beat the mixture until soft peaks form.  Spread whipped cream over pie and garnish with cocoa powder or chocolate shavings.

    -Guest Writer Michael (HML)


    [ad]

  • 14Dec

    In my inbox.

    -JAY

    ————————————–

    Be a Winner with this Easy Holiday Recipe;
    then Win $1 Million with a Recipe of Your Own

    Short on time for laying out a party spread that’ll wow your holiday guests?

    “The secret to creating something memorable is often as simple as pairing unexpected flavors that really hit it off,” says Dave Hirschkop, owner of Dave’s Gourmet (www.davesgourmet.com), maker of award-winning sauces.

    “It doesn’t have to be expensive or complicated,” he says. “If you mate ingredients that have chemistry, you’ll blow your guests away.”

    If you’ve already created that blow-em-away recipe – the sauce that’s the hit at every gathering – it could win you up to $1million in royalties in Dave’s Gourmet Recipe Challenge.

    And if you haven’t, Hirschkop has a gift for you: His Easy Holiday Dip will make short work of party-pleasing.

    Easy Holiday Dip

    1 ½ cups roasted red peppers (from jar or canned)

    1 8-ounce package of cream cheese

    ¼ cup pumpkin seeds

    1 Tablespoon olive oil

    ½ teaspoon paprika (I like smoked but any will do)

    Salt and pepper to taste

    Put everything into a food processor and pulse until smooth, creamy and delicious.

    Serve with fresh-cut veggies (carrot sticks, celery, you know the drill folks) pretzels or pita chips.

    For you chile heads, add a couple drops of your favorite Dave’s Gourmet hot sauce and make that dip rip!

    Dave’s Gourmet Recipe Challenge

    And now about that recipe contest. Dave’s Gourmet is looking for a winner to add to its product line, and guess who’ll get the royalties for six years? That’s right – you. Up to $1 million. Hey, it’s only fair if your name’s on the label.

    Payday starts immediately with a $2,000 advance.

    Just submit for your original recipe for a sauce, salsa or dip by Dec. 31 at www.davesgourmet.com. Dave’s team will test the recipes and choose semifinalists, who’ll be taste-tested by a Dave’s Gourmet panel. Finalists will be notified Jan. 12-14. The winner (or winners) will be chosen by food professionals attending the Fancy Foods Show in San Francisco. They’ll be notified Jan. 18.

    Isn’t it about time your killer sauce paid off? Dave thinks it is.

  • 11Aug

    Kelsey Bowden of Pros In The City shared this recipe from last year’s New Years Eve Gala

    -JAY

    —————————-

    Last year, we served an exotic grilled swordfish at our New Year’s Gala VIP dinner in DC, and I was able to convince the catering company  we use to reveal their secrets. I was given an exclusive “lesson” on how they prepare what they call their Broadbill with Chipotle Cilantro Butter (broadbill is another name for swordfish).

    I was surprised to learn that there are only seven simple ingredients in the New Years Eve in DC recipe:

    2 pounds of Swordfish cut into four 8 oz. steaks,

    8 ounces of butter,

    2 tablespoons of cleaned Chipotle peppers,

    2 tablespoons of fresh Cilantro (chopped),

    2 lemons,

    2 tablespoons of extra virgin olive oil,

    2 tablespoons of freshly ground coarse sea salt.

    The majority of the hands-on time in this recipe is actually spent preparing the ingredients. First, each of the steaks were rubbed with about ½ tablespoon of sea salt on one side then covered with plastic wrap and set aside. Swordfish is relatively tough, so the salt acts as a tenderizer. The chef told me that this was done to all of the steaks served on new years eve the morning of the event in order to be able to cook everything in time once the event actually started, but it doesn’t matter if you don’t let them sit that long.

    Meanwhile, while the fish was tenderizing, we pureed the chipotle peppers and whipped the butter in separate food processors. Next, we blended both ingredients and the fresh cilantro (the pulse setting worked really well for this). We then placed the mixture onto parchment paper, rolled in into a 1-inch cylinder, and put it into the refrigerator to harden. This step was performed the night before serving the dish.

    Of course, most foods are best when served right off the flame, so the steaks were cooked the night of the event. While we were waiting for the broiler to reach temperature (500 is ideal for cooking swordfish), we coated the steaks with olive oil and squeezed fresh lemon juice onto them. They broiled for about 5 minutes per side; a good way to tell when to flip them is when the first side starts to caramelize. Once they are done, they will have some spring too the touch, but not be too firm. We used a thermometer to be sure that they were cooked. An internal temperature of 155 makes them safe to eat. Be careful not to overcook them as it is very easy to do so.

    Each steak was served with several quarter inch slices of the butter and served them with steamed wild rice with fresh dill, asparagus, and carrots, just like at last year’s Gala. I must say, this is one dish I would not mind having several times a year.

    [ad]

  • 24Jun

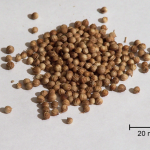
    Coriander "seeds." Image courtesy of Wikipedia.

    I was formally introduced to coriander for the first time through Rachael Ray’s “30 Minute Meals” episode covering a version of chicken tagine.  I had never heard of a tagine, or coriander (although I was familiar with the same plant’s leaves, cilantro)… but it was Rachael Ray.  I went out and promptly bought some of the spice, pre-ground.  On opening the jar, my nose proclaimed the sweet, lemony scent a winner.  I started putting the powder on a wide variety of foods, some good ideas, most not so much.  Sprinkling ground coriander over sushi, for example, remains one of my more spectacular failures.  However, oatmeal, vanilla ice cream, and couscous ended up delicious.  Baked goods of all kinds also benefit from coriander: apple pie, blueberry muffins, sugar cookies, and zucchini bread, just to name a few.

    To save you the trouble of experimenting, try adding coriander to these dishes the next time you make them:

    1.  Your Favorite Stir-Fry with Garlic & Ginger — about 2 teaspoons should do the trick.  Toss it in right before the dish is finished; the garlic highlights the coriander particularly well.  Personally, I like shrimp stir-fry the best, but tofu works just as well.

    2.  Quick Yogurt Sauce with Honey & Lime — use a tablespoon for every 2 cups of yogurt.  Throw in a couple dashes of lime juice and mix with honey to taste.  The sauce tastes great spooned over berries, or stir some into a handful of your favorite granola for fast snack.

    3.  Turkey Burgers — trust me!  Try adding 1 ½ teaspoons of coriander, some freshly chopped parsley, and cracked black pepper to your ground turkey.  The burgers gain a bright, summery taste that will please the taste buds of the young and old alike.

    4.  Risotto — use a teaspoon of the spice, and stir it in with about 5 minutes of cooking time left.  I’ve found that a few stalks of sautéed asparagus, chopped and served over the risotto, make a tasty presentation for someone worth impressing.

    Before I give my final tip, allow me to share a story.  In one of my more brilliant moments, I obtained some coriander seeds and ground them myself.  Unfortunately, I didn’t consider how peppercorn-like they would be in dishes.  What I mean, is that the little chunks of seeds retained their texture in most of the recipes I made.  I discovered that by braising the cracked seeds, I got much more favorable results.  I experimented and came up with a variation on my mom’s Dried Apricot Chicken.

    5.  Dried Apricot Chicken — I find that using fresh apricots yields mushy and unattractive results.  The quartered dried apricots keep their shape and color through the cooking process and just look prettier on the plate.  As an added bonus, the dried apricots have far less sugar than a regular jar of preserves.  Try this recipe and amaze your friends:

    • 1 ½ – 2 pounds of Chicken, cubed
    • ½ tsp salt
    • ½ cup diced Onion
    • 2 tsp minced Garlic
    • ½ cup diced Red Bell Pepper
    • 1 ½ cups Chicken Broth
    • 1 cup chopped Dried Apricots
    • ¼ tsp ground Ginger
    • 2 tsp Spicy Mustard
    • 2 tsp cracked Coriander seeds
    • Salt & Pepper to taste

    In a large skillet over medium-high heat, arrange the chicken cubes in a single layer and sprinkle with salt.  Drizzle with olive oil and cook the chicken until well done.  Remove from pan, and add the onion, garlic and bell pepper.  Cook over medium heat until the garlic starts to turn golden.  Return the chicken to the pan, along with the chicken broth and remaining ingredients.  Bring the dish to a boil over high heat while stirring, and then reduce heat to low.  Simmer for 10-15 minutes, or until the dried apricots begin to plump.  Add salt and pepper to taste, serve over couscous or brown rice.

    -Guest Writer Tiffany Kajer Wright (TKW)

  • 05Mar

    My friend Lubos has a Slovak Recipe Website and yesterday brought some of these bow ties to an event where I was the guest speaker at GMU so I could try a Slovak dessert. Thanks so much Lubos–they were delicious. I do get the funnel cake comparison even though they do not look alike. Here is his recipe for Fánky.

    -JAY

    [ad]

  • 09Jan

    Kudos to DCFüd’s own…Janet (JDS) whose soup recipe was featured on Capital Cooking’s blog for National Soup Month. I bet you could make a tasty vegetarian version of this by substituting vegetable stock for chicken stock.

    -JAY[ad]

  • 02Jan

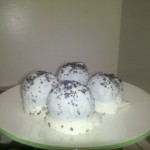
    A few years back, I had dinner with some friends, and one of them made these sugary, scrumptious, little bundles of happiness. She called them “cake balls”. I call them truffles, because “cake balls” sounds funny to me. Despite the deliciousness of the truffles, they only required three ingredients, which makes them even more fantastic, and can also be made in about an hour, if you need a dessert quickly.

    Recipe:

    -One 8 oz. block of cream cheese, softened
    -One box/container/slab of Oreo-type cookies
    -One bag of white chocolate chips

    Using a food processor, crush the cookies until they are a fine crumb. Reserve ¼ cup. Mix in the cream cheese until well-blended. Roll small pieces of the dough into golf ball-sized balls, place them on waxed paper on a cookie sheet, and either freeze for 15 minutes, or refrigerate for an hour. After they are set, melt the chocolate chips (using a microwave, double boiler, or whatever your preference may be), and dip the truffles into the melted chocolate. Shake off the excess, and place on another sheet of waxed paper on a cookie sheet. While the chocolate is still wet, sprinkle the reserved crumbs over the truffles, and place in the freezer for 30 minutes, or the refrigerator for two hours. Serve and enjoy.

    The beauty of these is that they can be frozen (I’ve had them in the freezer for nearly two months) and customized. I believe the original recipe uses actual cake (in place of the cookies, bake a sheet cake according to the directions on the box, let it cool, crumble, add cream cheese, etc.), so different types of cake or chips can be used. Favorites so far have been peanut butter chips coating peanut butter Oreos, white chocolate chips coating lemon cake (with a little lemon extract added), and white chocolate chips coating red velvet cake. They can even be made using reduced fat Oreos and fat free cream cheese with no noticeable taste difference. As for decorations on the top, you can melt a few dark or milk chocolate chips and drizzle over the white chocolate or peanut butter coatings. I was planning on making white chocolate-peppermint coating for the holidays, but apparently peppermint extract in Arlington is hard to come by. The world is your oyster, so be creative and enjoy!

    -JDS

    [ad]

  • 06Dec

    I’m not a baker/cook/chef by any stretch of the imagination, but I (and I figure most of the world) love to try a new recipe

    Picture by JDS

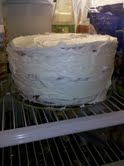
    every now and then. A few weeks ago, a friend of mine had posted a link on his Facebook page about the Cherpumple. For those that haven’t seen or heard of the Cherpumple, it’s essentially a dessert version of the turducken (a chicken inside of a duck inside of a turkey). Chef Charles Phoenix had created the Cherpumple, which was an apple pie baked inside a layer of spice cake, a pumpkin pie baked in a layer of golden cake, and a cherry pie baked in a layer of white cake, all stacked together and smothered in cream cheese frosting.

    I decided to make a version of this for Thanksgiving for my friend, Brian, the head chef at Restaurant 3 in Clarendon, as a “Happy Thanksgiving/Congratulations on Being on Bacon Paradise” gift. However, I don’t like cherry pie. It looks like guts and tastes strange, so I decided to create the Pecpumple: an apple pie baked into a vanilla cake, stacked on a pecan pie baked into a butter cake, stacked on a pumpkin pie baked into a spice cake, and covered in cream cheese frosting (frozen pies, boxed cake mix, canned frosting). In my mind, this was a simple feat, but as it got closer to go-time, I began to worry about the structural stability of this monster (guess that half a Master’s in Engineering didn’t help much). Common sense kicked in and reminded me that cake is generally crumbly and pie is generally gooey. These combined could easily make for a disaster, so I made the cakes denser by adding whole milk and eggs, and decreasing the amount of water added (I kept the oil and butter in because no one likes a dry cake).

    The pecan-butter layer was first, since I failed to read the directions on Phoenix’s website and both the pumpkin and apple

    Click for larger pics.

    pies needed to bake and cool first. The process seemed simple enough; make batter, pour some batter in the pan, add pie, add batter, bake, cool, stack, frost, dive in. Nowhere in the directions mentioned how much batter to cover the pie with, so I ended up with a few smoke alarms screeching, and a nice circular design of batter on the bottom of my oven. Luckily, I was able to clean that with no issue and proceeded to bake each layer, each with less batter overflow. There was a ton of excess cake batter remaining, so I baked a couple of cakes for my office and friends while I waited for the layers to cool.

    Obviously, each layer was quite heavy (pie inside of a cake- duh), and after carefully stacking the apple on top of the pecan on top of the pumpkin and quickly frosting each layer and sides, the Pecpumple was born. Except for that hole where the apple pie filling was oozing out (patched shut with a scoop of frosting), it was just as I pictured. It was a tower of happiness; of pies and cake and frosting and all-around deliciousness.

    Welcome to the world, Pecpumple.

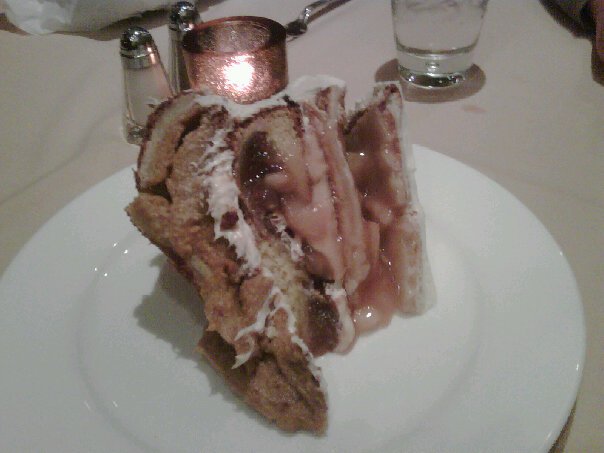
    We brought it to the restaurant, where we would be having Thanksgiving dinner, and placed it in the refrigerator to set a little bit longer. When it was time for dessert, Brian and his sous chef, Sean, cut the masterpiece. One word: glorious. Actually, if I’m being honest, the one word would be “shocked”. The Pecpumple stayed together and didn’t look like the result of a food fight between Betty Crocker and Mrs. Smith. And it was delicious. Very sweet, of course, but a great combination of desserts, and a nice switch-up from the usual pumpkin or sweet potato pie that is synonymous with Thanksgiving. Would I do this again? You bet. Should everyone try this? You bet. Will you get a little stabby when the crust on the pie burns and you have to shave it off with a knife because your oven is old and cooks uneven? You bet. But you laugh and move on. They always say that nothing that’s ever worth doing is ever easy, and this is something that is definitely worth doing. And if it ends up collapsing or imploding, oh well, you now have six desserts smashed into one, so grab a fork and dig in.

    The first slice of the Pecpumple. Eat your heart out, world.

    -Guest Blogger Janet (JDS)

    [ad]

  • 24Sep

    By Chef Michael Kiss of Whole Foods Market in Arlington.

    Rustic local ginger gold apple pie with raisins and pecans. Happy harvest season!

    Is it true an apple a day can keep the doctor away? Good nutrition is always a prescription for good health. But it IS true that an apple a day make a chef come out and play.

    I am an apple fan. I would even consider myself a superfan. I have many fond memories of picking apples with my family and of a bushel basket of apples that sat under the chopping block in our kitchen. That was the apple stash for the autumn and beginning of winter. So many quick snacks as well as pies and treats came out of that basket. It was always such a sad event when we had to switch to grocery store plain (red delicious) apples after the last apple was taken from the basket.

    Well, we can still find plenty of orchards and farmers markets to find fresh amazing apples, but gone are the days of grocery store plain apples. Here at Whole Foods Market we take pride in offering the best local apples we can find.

    Apple Facts I:
    • The crabapple is the only apple native to North America.
    • Apples come in all shades of reds, greens, and yellows.
    • Two pounds of apples make one 9-inch pie.
    • Apple blossom is the state flower of Michigan.
    • 2,500 varieties of apples are grown in the United States.
    • 7,500 varieties of apples are grown throughout the world.
    • 100 varieties of apples are grown commercially in the United States.
    • Apples are grown in all 50 states.
    • Apples are fat, sodium, and cholesterol free.
    • A medium apple is about 80 calories.
    • Apples are a great source of the fiber pectin. One apple has five grams of fiber.

    Gingered Curry Apple Salad
    3 tart apples cored and sliced. Keep in water with a little lemon juice in it.
    ½ red onion sliced
    2 stalks of celery sliced on a bias
    ¼ C of raisins (red or white)
    ½ tsp of mustard seed
    3 Tbs. cider vinegar
    1 tsp. oil
    ¼ tsp curry powder
    1 tsp. sugar
    Season with salt and pepper
    Combine ingredients and let stand 1 hour before serving.

    Apple Facts II:
    • Apples are a member of the rose family.
    • Apples harvested from an average tree can fill 20 boxes that weigh 42 pounds each.
    • The largest apple picked weighed three pounds.
    • Europeans eat about 46 pounds of apples annually.
    • The average size of a United States orchard is 50 acres.
    • Many growers use dwarf apple trees.
    • Charred apples have been found in prehistoric dwellings in Switzerland.
    • Most apple blossoms are pink when they open but gradually fade to white.
    • Some apple trees will grow over 40 feet high and live over 100 years.
    • Most apples can be grown farther north than most other fruits, because they blossom late in spring, minimizing frost damage.
    • It takes the energy from 50 leaves to produce one apple.

    Basic Gastrique
    This is a basic recipe for a classic French autumn sauce traditionally for game. It is a versatile sauce and is excellent for fish and vegetables as well. The basic recipe to remember is a balanced sweet and sour element mixed with the richness of reduced stock. Fruit vinegars add great interest to the flavor and often have sweet/tart elements in their flavor.

    Apple Gastrique
    1 box of chicken or beef stock, simmered and reduced by 75%

    ½ C. cider vinegar
    ½ C. sugar
    1 apple diced
    Mix vinegar and sugar and reduce by half. Add in the stock reduction. Taste and adjust seasoning.

    If too sweet add vinegar. If too tart add sugar. If too bright add stock, if too muddled add vinegar /sugar mixture.
    Next while still hot add the diced apple and let simmer for 1 minute to soften the apples.
    For added richness whole butter can be whipped in, but I prefer to keep it lighter and omit the butter.

    The sauce should be thick enough to coat the back of a spoon, but it shouldn’t be as thick as gravy.

    Apple Tips:
    • Apples store better at room temperature
    • A little lemon juice in some water will help keep apples from browning. Don’t leave them in water too long as it may make the apples soft.
    • Cook your apples before you make a pie and they will keep the pie crust full. No pie caves!

    Enjoy life and eat well!

    [ad]

Categories

Archives